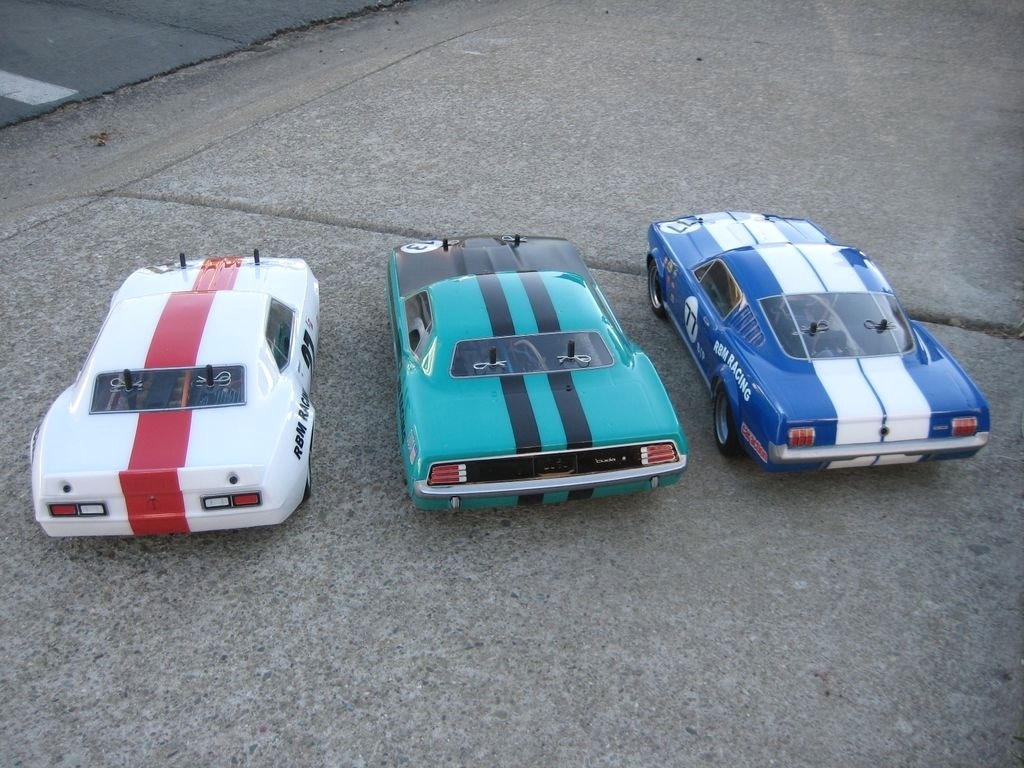
A few years ago, a couple of friends and I decided that we wanted some old school Trans-Am cars to race. We dug out our old Associated TC3 electric sedans, browsed some hobby catalogs, and immediately began negotiating to make sure we each got the car we wanted. After much discussion and bribing one another with pizza, we settled on a Ford Mustang GT-350, a Chevrolet Camaro Z28, and a Plymouth AAR ‘Cuda.
For the wheels we went with HPI’s vintage 26mm sedan rims and tires. The black rims were a little too plain, so I hit them with a silver Sharpie pen to highlight the inner rim and wheel nut details. It only took a couple of minutes per tire, required no special preparation, and looks great. Making the “HPI Racing” lettering stand out on the tires, however, was a little trickier. After much experimentation, I used a white paint pen from a craft store that was designed for use on rubber. I made a little pool of paint in an old soda bottle cap and applied it to each tire with a toothpick, one tiny dot at a time. The paint dots connect when placed close enough to one another, creating smooth letters. Total time per tire was about 15 minutes which really isn’t too bad; I’d call that three hours well spent.

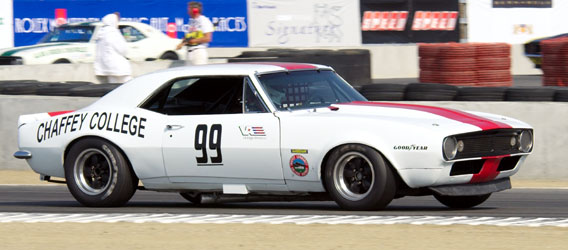
Next it was time to start deciding on paint schemes. We browsed hundreds of vintage Trans-Am racing photos until we settled on some designs we liked. Although our cars were not intended to be scale models, we did want them to be as period-accurate as possible. Paint colors and patterns were matched fairly accurately with the real thing – close enough to give our cars an authentic vintage racing look. Here’s a couple pictures of our real-world inspiration cars:

One of the very hardest things to replicate on these cars was all the lettering and sponsor decals. A few decals were lifted from old, leftover sticker sheets, but we were completely on our own for the rest. We printed out the small “fender” decals on a color laser printer, backed the paper with white plastic tape, and glued each one to the inside of the body using xxx main picture glue. The large numbers and letters were designed on a computer and cut out using an automated vinyl sheet cutter. Unfortunately I don’t have a vinyl cutter… but Kinko’s does. The lettering was a little on the expensive side to produce but it was well worth it for the final result.

After many hours of masking, painting, back-masking, and applying our custom vinyl lettering, the bodies were getting very close to done. Some additional details were needed to really bring the look home, such as the X-ed out headlights on the Cuda and Camaro. Black Pactra trim tape worked perfectly for this and really looks authentic. I also used some silver trim tape to make the aluminum braces that help hold the windows in on the full-size cars. A few dots with a fine-tip Sharpie here and there to create “rivets” and the cars were finally complete.
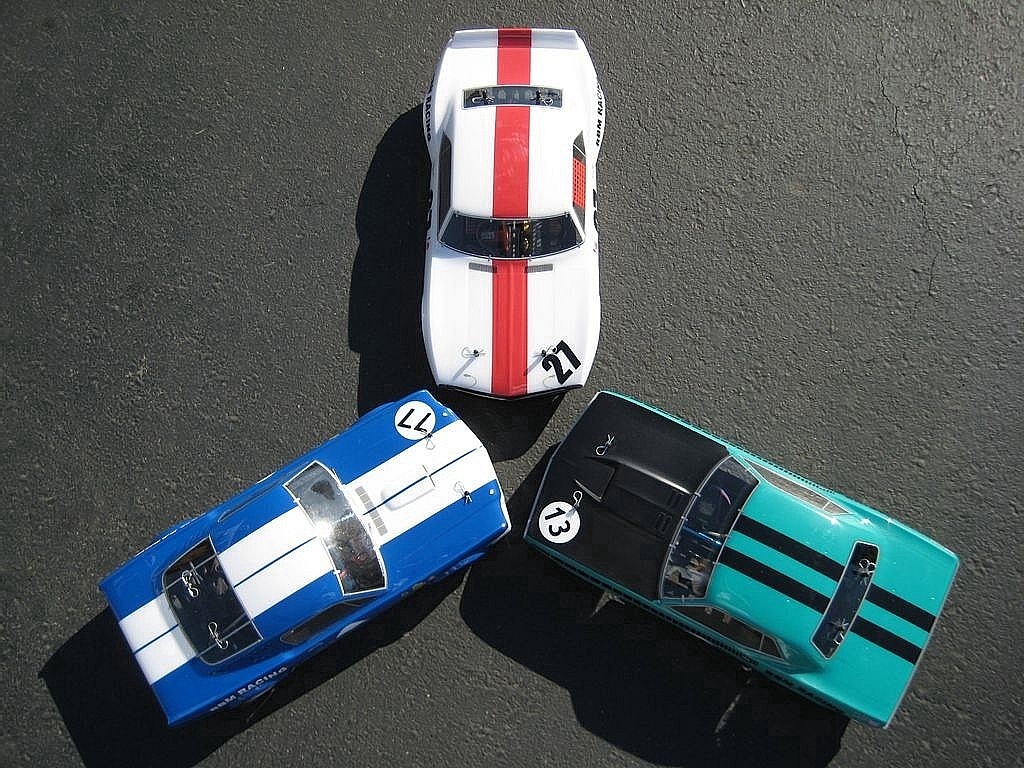
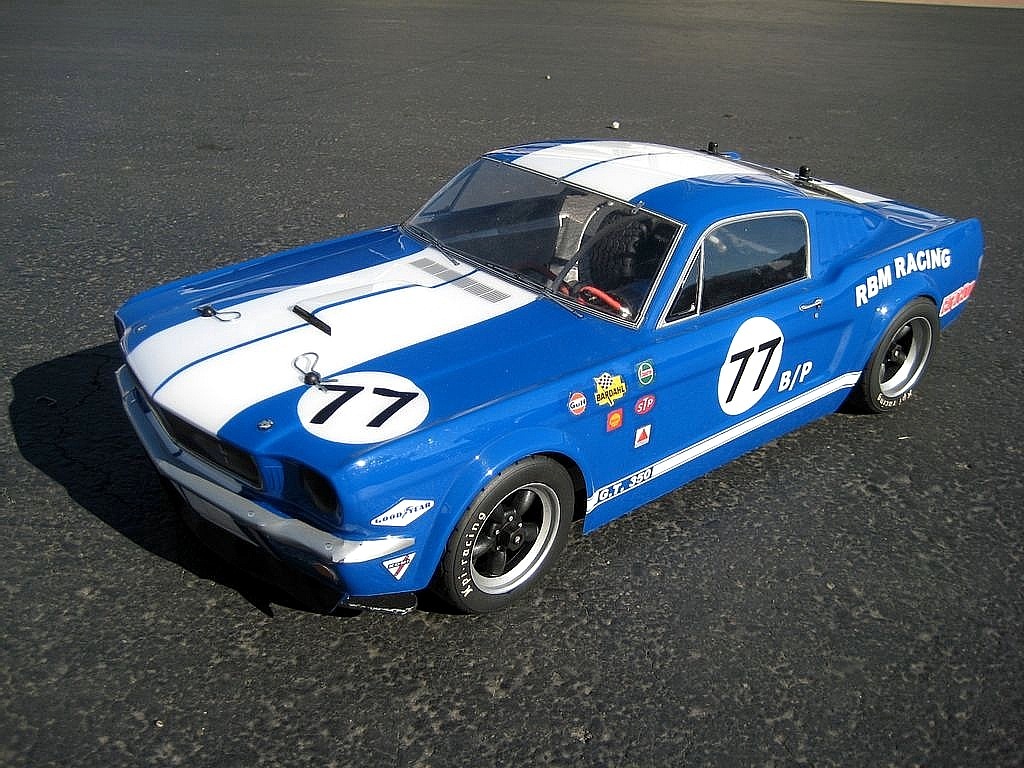 Robert “The Adjuster” Burke’s 1965 Trans-Am Mustang GT-350 #77
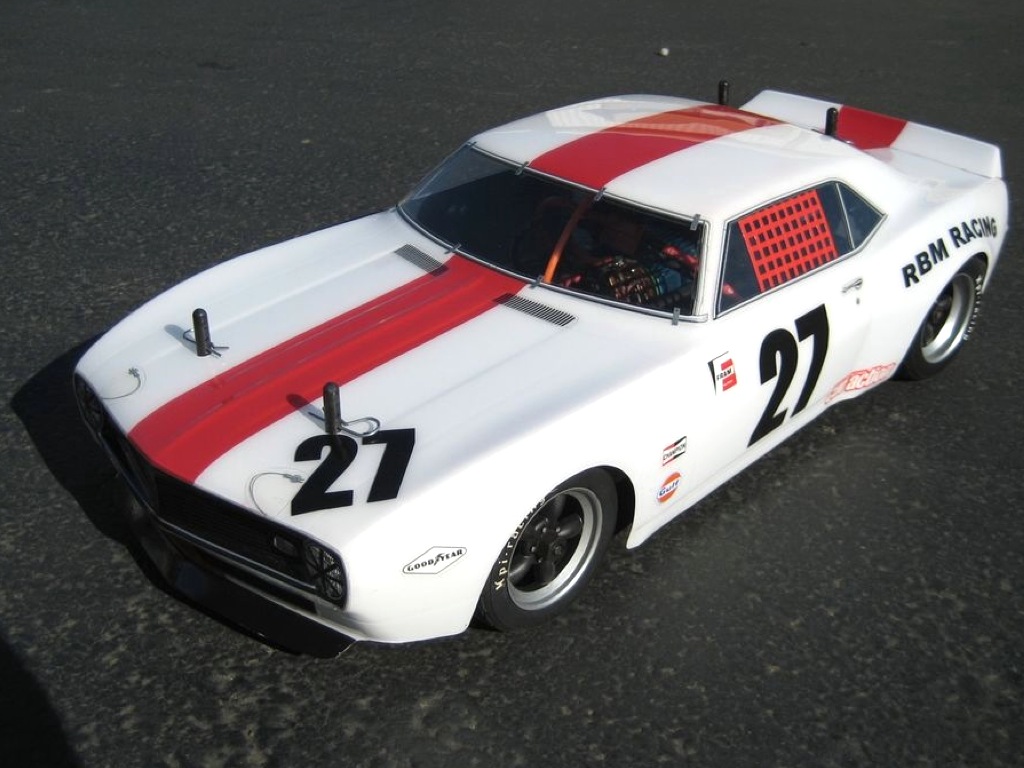 Eric J. Miller’s 1969 Trans-Am Camaro Z28 #27
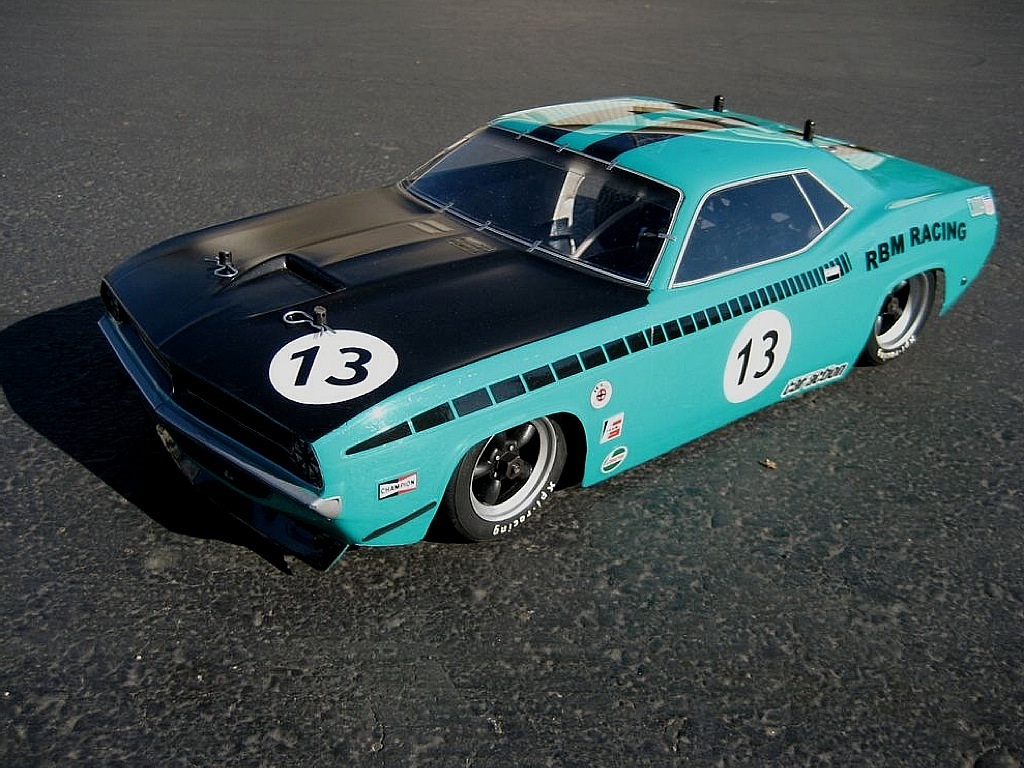 Tom Ross’s 1970 Trans-Am AAR ‘Cuda #13
Unfortunately, these bodies never actually made it out to the race track. Instead they have been sitting happily on our shelves since being completed back in 2008. That’s not really a bad thing though, because they do make rather nice shelf queens. Still, one of these days we’re planning to pull these cars off of their shelves and do a bit of racing, 4-cell Trans-Am style.
The post Trans-Am trio appeared first on RC Car Action.


